 Notes: This tut was done in PSP 10 but should work as well in other versions. Some knowledge of, and experience with, PSP is required. A trial version of PSP can be downloaded from here. You are welcome to use my images, or use your own If any filters are used, please note that if you don't already have them installed that you will have to close PSP, Install, then start PSP again. Advanced Supplies: Tubes/Graphics/Images: Vampy_11.09 Vampy_09.09 Bella&Edward tree climbing ABC Edward carrying bella Edward-And-Bella2-Tw#14B5E5 twilightwordart3bynicki twilightwordart2 !FILMSTRIP01~14U Tronds Filters II Filter Unlimited 2.0 Step 1: Filmstrip Use your magic wand and select all the transparent areas Layers/New Raster Layer Flood Fill with Black Selections/Select None Select the first full square of the filmstrip Step 2: Take Vampy_09.09 Edit/Copy Edit/Paste Into Selection Selections/Select None Close this image Step 3: Take Vampy_11.09 Select the next square Edit/Copy Edit/Paste Into Selection Selections/Select None Close this image Step 4: Bella & Edward Select the next square Edit/Copy Edit/Paste Into Selection Selections/Select None Close this image Step 5: Bella&Edward tree climbing ABC Select the next square Edit/Copy Edit/Paste Into Selection Selections/Select None Close this image Step 6: Edward carrying bella Select the next square Edit/Copy Edit/Paste Into Selection Selections/Select None Close this image Step 7: Edward-And-Bella2-Tw#14B5E5 Select the 1/2 square Edit/Copy Edit/Paste Into Selection Selections/Select None Close this image Step 8: Layers/Merge/Merge Visible Move the image to the top 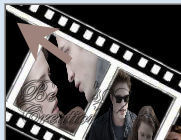 Crop off the transparent area Step 9: twilightwordart3bynicki Highlight the middle layer Layers/Merge/Merge Down Edit/Copy Edit/Paste as a new image Selections/Select All Selections/Float Selections/De-Float Selections/Modify/Expand/1 px Flood fill with White Selections/Select None Image/Re-size to 50% Edit/Copy Edit/Paste as a new layer onto your main image Place in the lower left side Close Wordart Step 10: twilightwordart2 Choose which one you would like to use This was my choice, so the following steps will be used for this choice, may be different depending on the one that you chose 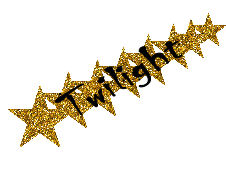 Edit/Copy Edit/Paste as new layer onto your main image Image/Free Rotate  Move to the top right hand side Highlight the letters 'Twilight'  Effects/3D Effects/Drop Shadow 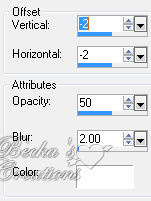 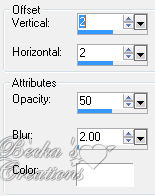 Selections/Select None Layers/Merge/Merge Visible Step 11: Image/Add Borders/1 px/White Image/Add Borders/10 px/#d39320 Highlight this border Effects/Plugins/Tronds Filters II/Woodstock/Default Effects/3D Effects/Inner Bevel 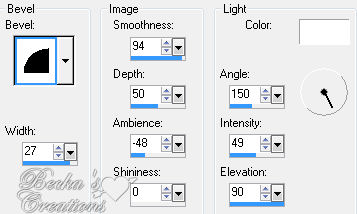 Selections/Select None Imge/Add Borders/1 px/Black Image/Add Borders/ 20 px/White Highlight this border Effects/Plugins/Filters Unlimited/Distotion Filters/Splash 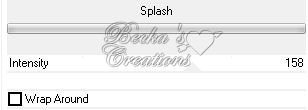 Effects/3D Effects/Inner Bevel/Same as before Effects/3D Effects/Drop Shadow/Same 2 as before Selections/Select None Image/Add Borders/1 px/White Step 12: Layers/New Raster Layer Add Watermark Add Name Layers/Merge/Merge Visible Voila!! ©CreateWithBecka 2009-2011 7-10-10
|
|


Make a Free Website with Yola.