Notes:
This tut was done in PSP 10 but should work as well in other versions.
Some knowledge of, and experience with, PSP is required.
You are welcome to use my images, or use your own
If any filters are used, please note that if you don't already have them
installed that you will have to close PSP, Install, then start PSP again.
Supplies:
500 x 500 Transparent Image
SMMDragon
Norah_Abstract011
Preparation:
Edit/Copy your image(s)
Edit/Paste as new Image(s)
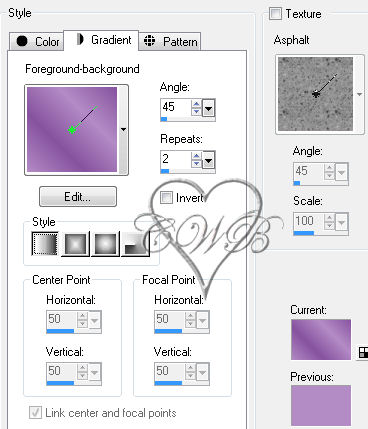
Pick 2 colors from your image (I chose #b38bc5 and #86529f)ese 2 colors
Make a gradient using these settings
Step 1:
Flood this gradient onto your blank canvass
Layers/New Raster Layer
Flood fill with white
Layers/Arrange/Bring To Top
Step 2:
Layers/Load-Save Mask/Load Mask from Disk
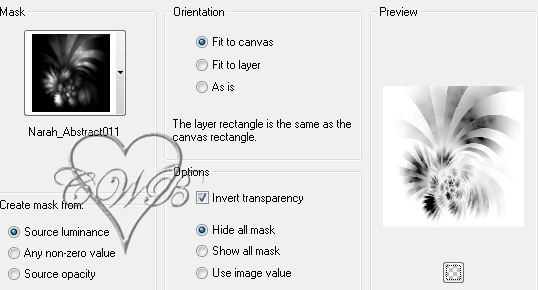
Highlight the top layer
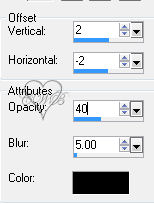
Effects/3D Effects/Drop Shadow
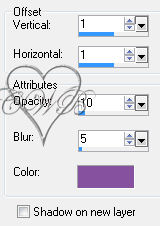
Layers/Merge/Merge Down
Click on the Rotate Right button

Step 3:
Take the dragon image
Lower the opacity to 50%
Edit/Copy the dragon
Edit/Paste as a new layer
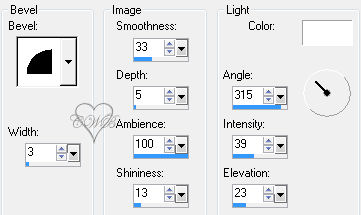
Effects/3D Effects/Inner Bevel

Step 4:
Image/Add Border/1 px/Black
Image/Add Border/15/White
Use the magic wand and highlight the border
Selections/Invert
Edit/Copy
Selections/Invert
Edit/Paste Into Selection
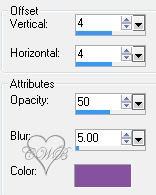
Effects/3D Effects/Drop Shadow

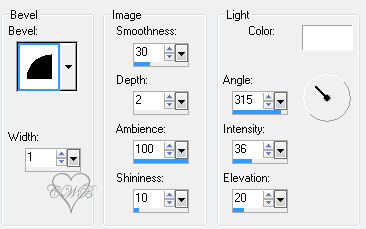
Effects/3D Effects/Inner Bevel as before
Step 5:
Layers/New Raster Layer
Add Name
Effects/3D Effects/Drop Shadow

Layers/New Raster Layer
Add Watermark
Layers/New Raster Layer -- Optional
Add a Caption -- Optional
Effects/3D Effects/Drop Shadow


Effects/3D Effects/Inner Bevel
Layers/Merge/Merge Visible
Re-Size to 500 on the longest side - if needed
®©CreateWithBecka
8-23-11


