Notes: This tut was done in PSP 10 but should work as well in other versions. Some knowledge of, and experience with, PSP is required. A trial version of PSP can be downloaded from here. You are welcome to use my images, or use your own If any filters are used, please note that if you don't already have them installed that you will have to close PSP, Install, then start PSP again.
Preparation: All images Edit/Copy Edit/Paste as a New Image
File/New
Pick 2 colors from 1 of the images Make these colors into a gradient
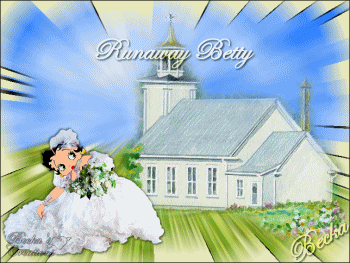
Step 1: Take your 600 x 440 image Effects/Plugins/Filters Unlimited/Render/Clouds (white/Blue)
Step 2: Layers/New Raster Layer Make a selection at the bottom of the image Layers/New Raster Layer Edit/Copy - The Grass Edit/Paste Into Selection Selections/Select None
Step 3: Make another selection right above the other grass layer Layers/New Raster Layer Edit/Paste Into Selection Selections/Select None Move down this layer until it blends
Step 4: Keep adding the Grass in sections until it looks good to you, I have 6
Step 5: Take your 2nd, 4th, 6th grass layers (or however many you should have) Image Mirror Close off the cloud layer Layers/Merge/Merge Visible Keep the grass layer highlighted Effects/Geometric Effects/Prospective Vertical Effects/3D Effects/Drop Shadow Open the cloud layer
Step 6: Image/Add Borders/1px/Black Image/Add Borders/20 px/White Highlight this border Flood fill with your gradient Selections/Select None Effects/Plugins/VM Natural/Splash! Center X: 121 Center Y: 123 Frequency: 19 Ray Length 1: 17 Ray Length 2: 22
Step 7: Edit/Copy the church Edit Paste as a new Layer Image/Mirror Move to the middle/right side With your church layer Highlighted Effects/Plugins/FM Tile Tools/Blend Emboss Image/Add Borders/1 px/Black
Step 8: Take Betty Edit/Copy Edit/Paste as a New Layer Image/Mirror Image/Re-Size to 75% or what looks good to you Effects/3D Effects/Drop Shadow Layers/Merge/Merge Visible
Step 9: Highlight the cross on the church Layers/Duplicate Close the Merged 1 Highlight the Copy of Merged 1 layer Adjust/Add-Remove Noise/Add Noise Open the Raster 1 Layer Close the Copy of Raster 1 layer Adjust/Add -Remove Noise/Add Noise Selections/Select None
Step 10: Add Name Add Caption Layers/New Raster Layer Add Watermark Layers/Merge/Merge Down -- until you have 3 layers
Open Animation
Step 11: Close off your bottom layer Highlight the top layer Edit/Copy Edit/Paste as a new Animation (in Animation) Go back to PSP Close off the top layer Highlight the bottom layer Edit/Copy Edit/Paste/Paste After Current Frame View/Animation Animation/Re-Size to 350 on the longest side - or what looks good to you