 Notes: Beginner Supplies: ABC-Siem tube DSB Flux Gold #fff8b2 Preparation: Open a transparent 600 x 800 imageTake your tube Re-size to 75% Edit/Copy Close the original Pick 2 colors from your image and make a gradient  Step 1: Working with your transparent image
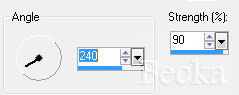
Re-size the longest side to 400 Adjust/Softness/Soft Focus  Step 2: Image/Add Borders/10 px/Gold (#fff8b2)Highlight this border Effects/3D Effects/Inner Bevel  Effects/3D Effects/Cutout  Selections/Selections None Step 3: Image/Add Borders/20 px/Your light color Step 4: Image/Add Borders/10 px/Gold (#fff8b2)Highlight this border Effects/3D Effects/Inner Bevel/same as before Effects/3D Effects/Cutout/same as before Image/Add Borders/1 px/Black Step 5: Layers/New Raster LayerAdd watermark Add name Add Caption Layers/Merge/Merge Visible Voila!! 8-22-09
|
|


Make a Free Website with Yola.