 Notes: Advanced Supplies: FBR_andnomorewar_Wildfire2003_9-18-09
Preparation: Open the female tube Duplicate Resize to 70% Close the original Open Jesus_cr Duplicate Resize to 85% Close the original Pick 2 colors from your tube
Make a gradient out of these colors Settings your choice Step 1: Layers/New raster Layer
Step 2: Take your Jesus tube Edit/Copy Step 3: Highlight your gradient layer
Resize to: 75%, make sure that All Layers is checked Step 4: Use your 'Selection tool' and select 2 areas of your choosing. Step 5: Image/Add Borders/1px/Black
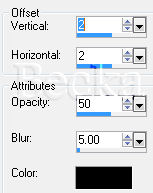
Image/Add Borders/10 px/White Highlight your white border Take you S1 image Edit/Copy Edit/Paste into selection Effects/3D Effects/Outer Bevel
Selections/None
Step 6: Image/Add Borders/1px/Black
Image/Add Borders/10 px/White Highlight this border Edit/Copy - your S2 image Edit/Paste INTO Selection Selections/None This what you should have now
Step 7: Image/Add Borders/10 px/White
Highlight your border Once again take your S1 image Image/Mirror Effects/3D Effects/Outer Bevel - same as before Selections/None Step 8: Image/Add Borders/1px/Black
Image/Add Borders/10 px/White Highlight this border We will be using our S2 image Effects/3D Effects/Outer Bevel - same as before Selections/None Step 9: Image/Add Borders/1px/Black
Image/Add Borders/20 px/White Highlight this border Edit/Copy your S2 image Edit/Paste into selection Effects/3D Effects/Outer Bevel - same as before Selections/None Step 10: Image/Add Borders/1px/Black Step 11: Layers/New Raster Layer
Add watermark Font and settings - your choice Add a Name Add a Caption Layers/Merge/Merge Visible Voila!! ©CreateWithBecka
|
|


Make a Free Website with Yola.