Notes:
This tut was done in PSP 10 but should work as well in other versions.
Some knowledge of, and experience with, PSP is required.
A trial version of PSP can be downloaded from here.
You are welcome to use my images, or use your own
If any filters are used, please note that if you don't already have them installed that you will have to close PSP, install, then start PSP again.
Intermediate
Supplies:
CJ_Accents12
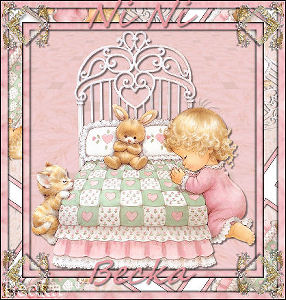
SG_RM_018_Girl Prays At The Bed_smaller - Resized
Filters Unlimited
Mura Meister
Simple
Segoe Script - or your choice
Preparation:
Pick out an accent -- or use mine
Edit/Copy
Edit/Paste as a new Image
Resize to: 20% -- if using your own accent, resize to what looks good to you
Close the original
Minimize
Take the Girl image
Edit/Copy
Duplicate twice and close the original
Minimize 1 copy
Pick 2 colors from your tube
Lets Get Started
Step 1:
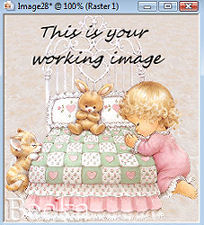
Take the girl image - This will be your main image
Layers/New Raster Layer
Make sure that your raster 1 layer is at the top
Flood Fill your Raster 2 layer with one of your colors
Layers/Merge/Merge Visible
Effects/Image Effects/Seamless Tiling/Default
Effects/Plugins/Filters Unlimited/Distortion Filters/Explosion
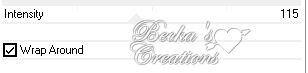
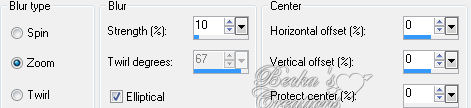
Adjust/Blur/Radial Blur
Effects/Reflection Effects/Kaleidoscope

Effects/Image Effects/Seamless Tiling/Default
Layers/New Raster Layer
Layers/Arrange/Move Down
Flood fill with your other color
Layers/Merge/Merge Visible
Effects/Plugins/Mura Meister/Perspective Tiling/Default
Layers/New Raster Layer
Flood Fill with White
Lower the opacity to: 30
Layers/Merge/Merge Visible
Step 2:
Take your other main image and Edit/Copy
Edit/Paste as a new layer onto your working image
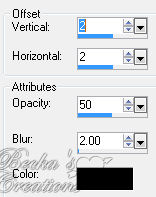
Effects/3D Effects/Drop Shadow

Step 3:
Still on your working image
Image/Add Borders/1 px/Black
Image/Add Borders/10px/White
Highlight this border
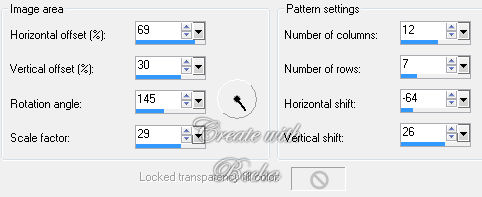
Effects/Reflection Effects/Pattern
Effects/3D Effects/Drop Shadow


Click on your Raster 1 layer
Layers/Arrange/Send to Bottom
Edit/Copy
Edit/Paste as a new Image - This will be your frame
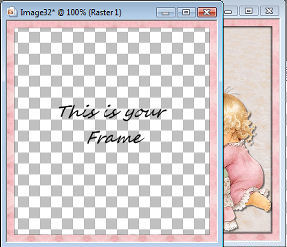
Selections/Select None
Image/Add Borders/1 px/Black
Step 4:
Image/Add Borders/20 px/White
Highlight this border
Click on your Materials Palette
Click on Pattern
Angle: 125
Scale: 55
Flood Fill with the pattern that looks like your image
Add the same 2 Drop Shadows that you did in Step 3
Click on the raster 1 layer
Layers/Arrange/Send to Bottom
Selections/Select None
Layers/Merge/Merge Visible
Image/Add Borders/1 px/Black
Step 5:
Image/Add Borders/10px/White
Highlight this border
Take your frame that you made earlier
Edit/Copy
Edit/Paste Into Selection
Repeat both Drop Shadows again
Click on the Raster 1 layer
Layers/Arrange/Send to Bottom
Selections/Select None
Image/Add Borders/1 px/Black
Step 6:
Take your accent
Edit/Copy
Back to your working layer - Edit/Paste as a new layer
Move to the upper left corner
Effects/Plugins/Simple/Top Left Mirror
Effects/3D Effects/Drop Shadow/
Layers/Merge/Merge Visible
Step 7:
Layers/New Raster Layer
Add your Name
With these settings or use what looks good to you

Objects/Align/Horizontal Center in Canvas - or where it looks good to you
Effects/3D Effects/Drop Shadow - Same as above
Layers/New Raster Layer
Add a Caption - same as above
Objects/Align/Horizontal Center in Canvas - or where it looks good to you
Effects/3D Effects/Drop Shadow - Same as above
Layers/New Raster Layer
Add watermark
Layers/Merge/Merge Visible
Voila!!
©CreateWithBecka
2009-2011
4-20-10