 Notes: Intermediate Supplies: arrgt10
VM Toolbox
Preparation: 300 x 300 image
Step 1: Take your 300 x 300 image Step 2: Take your Floral image
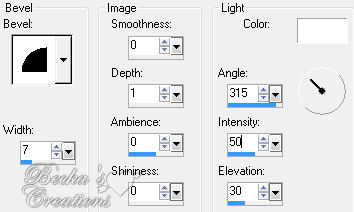
Effects/Image Effects/Seamless Tiling/Default Edit/Copy Edit/Paste INTO Selection -- main image Effects/3D Effects/Inner Bevel
Step 3: Image/Add Borders/20 px/White
Edit/Copy your floral tube Highlight your border with your magic wand Edit/Paste INTO Selection Effects/Plugins/VM Toolbox/Zoom Blur/Default Effects/3D Effects/Inner Bevel/same as before Effects/3D Effects/Drop Shadow   Highlight your Raster 1 layer
Layers/Arrange/Send to Bottom Selections/Select None
Step 4: Image/Add Borders/1 px/Black
Image/Add Borders/10 px/White Highlight this border Edit/Copy your floral tube Edit/Paste INTO Selection Effects/3D Effects/Inner Bevel/same as before Effects/3D Effects/Drop Shadow 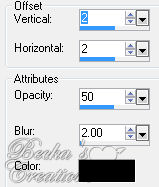 Selections/Select None Image/Add Borders/1 px/Black
Step 5: Take your magic wand and highlight the white in the middle and Delete
Maximize your other floral tube -- the untouched one Selections/Select None Edit/Copy Edit Paste as a new layer onto your main image Go back to your working image and Edit/Paste as a New Layer Image/Rotate/20.00/Left Move your flower to the lower right side Effects/3D Effects/Drop Shadow/Same as before Layers/New Raster Layer Add your watermark Add Name Layers/Merge/Merge Visible Voila!! 4-5-10   |
|

Make a Free Website with Yola.