Notes:
This tut was done in PSP 10 but should work as well in other versions.
Some knowledge of, and experience with, PSP is required.
A trial version of PSP can be downloaded from here.
You are welcome to use my images, or use your own
If any filters are used, please note that if you don't already have them installed that you will have to close PSP, Install, then start PSP again.
If this tutorial is in any way confusing, unclear, or you have any suggestions, please don't hesitate to contact me
Supplies:
An image of choice
Font of choice
PSP
Animation
Preparation:
500 x 500 transparent image
300 x 300 Transparent Image
Pick 2 colors - if using an image 2 from that - make a gradient, or alternate the colors

Step 1:
Take your 500 x 500 transparent image
Using a font that you would like to use - size depends on the project that you are working on
Type the letter or words that you would like to use
Layers/Convert to Raster Layer
If using an image - Rename this image - to help later
Edit/Copy
Edit/Paste as a New Layer
Minimize as needed
Close off the image layer
Use your magic wand and select inside the letter or words
Selections/Modify/Expand/1 px
Delete Raster 1
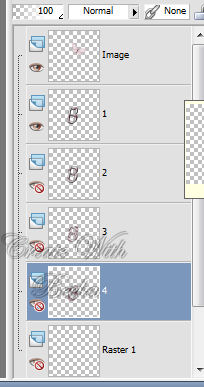
Layers/Duplicate 3x - name them 1-4
Step 2:
Close all layers except for Raster 2
If using a solid color - flood fill with one of your colors
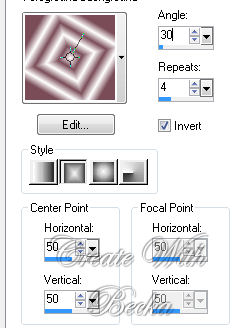
If using a gradient - Flood fill with a gradient of your choice and settings
Gradient Settings that I chose:

Effects/3D Effects/Inner Bevel

Edit/Copy
Edit/Paste as a New Animation
Step 3:
Close off Raster 2 layer
Highlight and open (Click on the eye) Raster 3
Solid color: use the other color from before
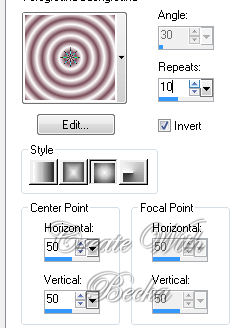
Gradient - change the settings
Settings that I chose are:
Effects/3D Effects/Inner Bevel

Edit/Copy
Edit/Paste/After Current Frame
Step 4:
Close off the Raster 2 layer
Open and Highlight the raster 3 layer
Solid color: use the other color from before
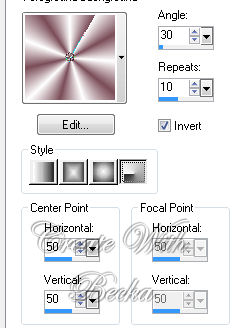
Gradient - change the settings
Settings that I chose are:
Effects/3D Effects/Inner Bevel

Step 5:
Close the Raster 3 layer
Open and Highlight Raster 4 layer
Solid color: use the other color from before
Gradient - change the settings
Settings that I chose are:
Effects/3D Effects/Inner Bevel

Open the image layer
Layers/Arrange/Send to Top
Layers/View/None
Selections/Select None
Step 6:
Open Raster 1
Open the image layer
Make sure that the image layer is highlighted
Edit/Copy
Edit/Paste as a New Animation

Edit/Undo
Delete layer 1
Step 7:
Open layer 2
Make sure that the image layer is highlighted
Layers/Merge/Merge Down
Edit/Copy
Edit/Paste/After Current Frame
Edit/Undo
Delete Raster 2 Layer
Step 8:
Open layer 3
Make sure that the image layer is highlighted
Layers/Merge/Merge Down
Edit/Copy
Edit/Paste/After Current Frame
Edit/Undo
Delete Raster 3 Layer
Step 9:
Open layer 4
Make sure that the image layer is highlighted
Layers/Merge/Merge Down
Edit/Copy
Edit/Paste/After Current Frame
Edit/Undo
Delete Raster 4 Layer
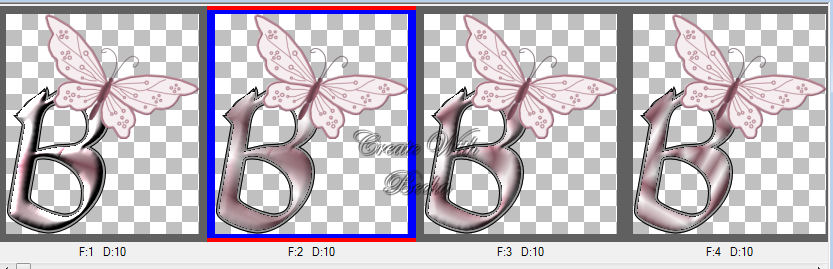
This is what you should have in animation -- yours will be different
Step 10:
Take your 300 x 300 transparent image
Add Watermark
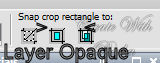
Crop/Layer Opaque
Edit/Copy
Edit/Paste as a new Animation
Step 11:
Make sure that you have 4 frames with your letter or words on
Edit/Select All
Take your watermark
Edit/Copy
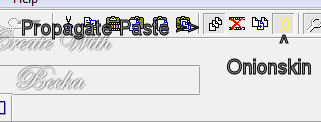
Make sure that you have onionskin and Propagate Paste highlighted
Edit/Paste Into Selected Frames
Place where you would like your watermark to be
View/Animation
Animation/Frame Properties - change the number if you don't like the speed

Each time that you change the speed, you should check it to see if that is how you like it
Re-Size animation if needed
®©CreateWithBecka
2-18-11


